Want Plastic-Free Glue? Make Homemade Wheat Paste.
I felt like I was back in kindergarten yesterday… cutting and pasting with paste you could eat if you wanted to. Â I’m taking my plastics information display to the ReUseConex in Portland tomorrow and wanted to make it sturdier. Taping paper pages directly to the wooden board was not working well. Â The paper curled and the natural cellulose tape I was using wouldn’t stay stuck to the wood.
This is NOT attractive:
So I decided to mount the pages on recycled cardboard. Â And to do that, I needed plastic-free glue. Â Finally, a chance to test out the recipe for homemade wheat paste that I included in my book without actually trying first!
How to Make Homemade Wheat Paste, aka Plastic-Free Glue
Ingredients:
- 1/2 cup flour (white or unbleached flour is best. Â Apparently, you can do it with whole wheat, but it might not be as sticky.)
- 3/4 cup cold water
- 3 cups boiling water
That’s all. Â According to this Instructable for making wheat paste, you can add other ingredients to make it stickier or to preserve it longer. Â But I just used flour and water. Â This recipe makes a lot of paste — way more than I needed for mounting all my pages. Â So cut it down if you’re not going to be putting up posters around town. Â It will last for a while in the refrigerator, but without preservatives, it will go bad fairly quickly.
Slowly pour cold water into flour and stir to make a paste.
Pour paste into the boiling water, stirring constantly.
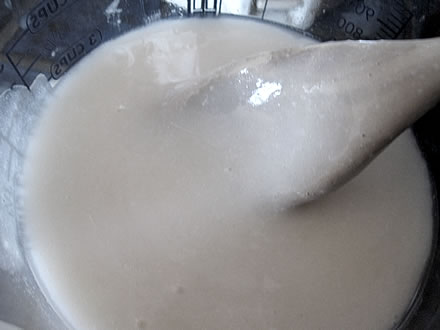
Cook for about 5 minutes or until the paste is thick and smooth.
Store in the refrigerator. Â I made it the night before and refrigerated it over night.
In the morning, I discovered that it was not smooth at all. Â In fact, it was lumpy, lumpy, lumpy. Â Now, I happen to like lumpy gravy, which is why I have never bothered to learn how to make it smooth. Â But I didn’t want lumps in my paste. Â So I put it through a sieve twice.
It worked!
I was ready to start pasting. Â I applied the wheat paste to the cardboard (not the paper) with a paint brush.
The first time, I used too much and the result wasn’t as smooth as I would have liked.
This is what it should have looked like… you want the paste to be transparent with no lumps.
Apply the paper to the cardboard.
Smooth out any bubbles. Â Then, let it dry completely.
This glue is strong! Â The paper is seriously bound to the cardboard. Â It won’t come off without ripping, which is what I wanted. Â Check out how smooth. Â (The ridges you see are from the corrugated box. Â They are not bubbles.)
I drilled holes into the wooden display board and attached the mounted pages using metal fasteners. Â I didn’t glue them to the board permanently because I need to be able to update the information and change the pictures. Â Compare this version to the one pictured at the top of this post. Â Much better, no?
I love it when my experiments work as they’re supposed to. Â I also love having an excuse to use a power drill.


we used this recipe in 4-H. our first project was covering a cardboard box like a shoe box with fabric. it worked great. never had a bug issue. in 4-H, we used it for all types of projects and of course, for poster boards and alike as well. safe for kids of all ages.
A USDA Forestry Service publication regarding the repair of early 20th century fiberboard installations gives the following recipe:
Mix 1 T wheat starch with 5 T distilled water.
Microwave on “High” for 20 – 30 seconds. Stir. Repeat until stiff and translucent.
Cool before use.
Once upon a time the Forestry Service would also supply upon request a publication comparing the strength and longevity of wheat pastes to other products.
lynhead52 silver fish would eat it, but then silver fish would eat the paper itself too, so… eh. It’s just starch, just like the paper. This is how books were bound in the Middle Ages, and those are pretty darned sturdy (especially compared to what passes for binding these days).
I would think this would draw bugs
Can you please suggest some kind of container for glue to take the place of glue sticks in my son’s kindergarten class. Here is challenge: not glass and no brushes to wash. I am thinking of something that has a brush or sponge built in to the lid. It doesn’t have to be excellent at applying the paste since kindergarteners will just clump it on anyway.
I am way late to this party, but I have an idea. If you have an old mascara or fingernail polish bottle, they come with brushes in the lids. You would make sure the bottle was plastic, not glass. I have seen them made out of both.
ive been using for 30 years to poster art – only in Sydney did i have mold issue – didn’t happen in Adelaide why im looking for pest and mold reducing properties – ive seen studies showing wheat paste outlasts commercial wall paper paste, cornstarch, rice flower and many other products. Ive seen rice flower destroy wall surfaces – paper curls up and takes 5mm of plaster and paint with it, even take paint off metal surfaces – let flower and some water sit a bit before adding bulk of hot water use egg whisk and lumps less of a problem. like making bread the weather air pressure humidity changes results slightly – brooms a great way to apply posters and give you reach above graffiti and last longer – you can get 60ft extendable brooms
I just came across this glue which says its made of rice paste, I guess it will have a longer shelf life than homemade ones. Have not bought it so I don’t know if the container is plastic.
http://shop.ecokidsusa.com/
Oil of cloves,peppermint, or vineger keeps the rice paste in longer mold- free working condition. If you make say half a cup and want it to last UP to a week in the frig you need a mold inhibitor. The paste will NOT permanently repel bugs such as silverfish, beetles, or roaches…for any length of time in terms of years. any type of paper, and natural based adhesives are attractants for insects and molds..especially if you live in a warm humid climate. Some rices are more sticky due to heavy starch content. If you are using a rice that says on the package to “wash 2-3 times†before cooking for food…that is a starchy grain. Again….try the jello as I posted previously. especially with small kids….its fabulously sticky, and they love the flavors, and colors. plus, it sticks ANYTHING. Gelatin has historically been used for glue way before the Middle Ages.
Making this now for something I am upcycling and I don’t want to use toxic spray glue. I’m going to add vinegar to help with bugs as the project will be kept in our 3rd bedroom/office closet.
Well, we Indians (as in people from India) have been using this glue for centuries and continue to do so today. Largely used to stick posters of movies to cinema hall walls, and binding sheets of paper into books. Also, great to stick wood to wood such as when sticking sunmica to a table.
The recipe to making lumpless glue is to slowly add water to the flour while mixing it with hands to get rid of lumps and then bringing the mix to boil. We make this using bleached wheat flour (maida) and it’s cheap as hell.
You can make a much better and easier glue Beth! Plain gelatin…in the packets…(Knox is usually the brand sold in grocery stores– plastic free packaging too!) You get some very hot water, and start by making very tiny bits….say, 1/4 cup of hot water, and sprinkle in some of the powdered gelatin in very very tiny amounts– keeping the ratio as the instructions say.. Keep stirring til the powder dissolves. This is when you brush on the liquid and paste down. You can even make stickers, or coat papers with the solution. Let it dry. Moisten when you are ready to stick with a brush or sponge or tongue. Its a natural, safe glue…its really amazing. There is NO cooking. We use it at work when we make art with kids…but we make 1/2 cup for each table, and we use flavored colorful “jello†powders. It will stick down even glossy magazine pages, dried pressed leaves…its really sticky until it dries.
You only make what you can use within the hour…as it will jell solid and have to be tossed away. You can keep the working time longer by adding a tiny bit of very hot water and mixing. I have made collages with this stuff. Its really fun….there are few glues that will paste slippery glossy papers together. this stuff works! Don’t know about the archival or acid free abilities of this glue. Since its protein based…I am sure its not the best for repairing any valuable books or papers.
@urbanwoodswalker It sounds like a great idea for someone who eats meat or is comfortable using animal products, but I am a vegetarian. I wonder if there is a similar vegetarian option.
@Beth Terry I did not think of that…! You basically are stuck with cooking various substances such as rice, or wheat, using synthetics, or…using heated wax. Tree resins…such as pine, or spruce, or compass plant or Prairie Dock could work…but not for paper….way too sticky and thick.
This is the best use for wheat. Consider how it acts in your gut–just like in paste. Yuck! Stop eating it and use it to stick things together instead.
Paul here from In the Heart of the Beast Puppet and Mask Theatre!
We have switched to cornstarch as our papier-mache medium of choice. It is cheap, effective and friendlier to the earth than our past paste choices.
How much cornstarch?
The standard one pound box from the grocery store would provide two batches, or twelve quarts, of the recipe below.
We buy cornstarch at our local food coop in bulk (25-pound bags). It is also available in 50-pound bags. Here’s the recipe from Jim Koplin.
5 quarts water bring to a full boil in a large pot.Dissolve 2 1/2 cups cornstarch in one-quart cold water. Stir cornstarch/water mixture into boiling water mixture.Stir this mixture for a minute or two over the heat ( a metal whisk works best) until mixture thickens a bit.Let cool and thin to desired consistency as you use it.It can be thicker or thinner depending on your project.
The recipe could be halved or doubled according to the size of the project.
@Paul Robinson Thanks for the recipe. Do you think cornstarch sticks better than flour? Or lasts longer?
I am not sure if cornstarch sticks better than flour, however we have been using this for years! It also doesn’t attract bugs as well as flour does. We must always also know that things will fall apart and breakdown eventually.
recipes for this sort of thing abound on the internet. You can add various things like cinnamon or peppermint oil( or vineger) to these recipes… to repel insects. The Japanese use rice glue…and they are known for their beautiful work with papers, and book binding.
Um….while normally I’m all for a plastic-free life, wheat paste glue is a Bad Idea. As a librarian, I can tell you that it will attract bugs. This is an area where the new stuff really is better.
@Kathy Hi. I guess it depends on the project. This particular project is not meant to be archival because the information will change, which is why I wanted to be able to change out the pages. You wouldn’t want to use this method for something meant to be preserved for many years.
Beth, Dominic has seen it used in India…they actually attach stamps to letters with it (:::
A homeschooler we know did a science fair project comparing a milk based glue, to the synthetic school glues. It tended to yellow and become brittle I think. I’d love to hear an update in a month about how your papers look. (yellowing, mildew…or just the same as now)
wow – genius!!
Will mould start growing on the paper craft work after a while? I remember throwing away my paper mache school project because the glue turned bad.
I’d love you to try it and let me know how it works out.
Any idea how to make gluten-free glue? I’m definitely curious about the sticky rice thing. Gluten-free grains are less sticky, in general.
YAY! I homeschool and lead book-making classes for kids and need glue, and the horrible plastic stuff does not even work well. It dries up too quickly, and you cannot revive it with a little warm water like we used to with “real†glue when we were kids. I am so going to use this.
(Um, before anyone is worried, these are not “real†books, just projects meant to be enjoyed for a season. In an area where high humidity or insects would be a problem, I would not use natural glue without being reassured by book repair experts that it is wise. Beth, would you please report back on how your glue holds up to the San Francisco winter?)
Nice! I have to try this – this should in theory be edible too, right? My wife loves making elaborate cakes, but regular icing doesn’t do the trick when sticking together pieces of cake..
YAY!!! I wat to make rice paste. I just haven’t. Yet.
Brilliant!
That whole 50s/60s thing is intended as a complement, BTW.
I was born in 1965, so that was way before my time. But one of my plastic-free strategies is to try and figure out how they did things before plastic became so prevalent, so I do take it as a compliment.
great post Beth.
Or sticky rice!!!!! (;;
Malema, how do you make it with sticky rice?
The look of this display reminds me of projects my older brothers made in Boy Scouts during the ’50s and ’60s. You have definitely earned your Merit Badge for Creative Use of Plastic-Free Materials.
The look of this display reminds me of projects my older brothers made in Boy Scouts during the ’50s and ’60s. You have definitely earned your Merit Badge for Creative Use of Plastic-Free Materials.
My four-year-old is in love with gluing things….I would love to be able to make this and funnel it into her elmer’s bottle…I wonder if that would work. I’ve been meaning to look into homemade glue but so far haven’t expended the startup energy to actually learn how to do it. Thanks for the inspiration!
Yes, you could put it in a squeeze bottle. However, you do have to keep it refrigerated. And bear in mind that it needs more time to dry. It isn’t immediately as sticky as Elmer’s glue, but it holds fast after it dries. Some people add sugar to make it more sticky, but I didn’t find that to be necessary.
Try the gelatin glue I posted above first. Its great for young children…whereas the cooked glues are more work, and less fun .